Indications for Pericardiocentesis: Pericardial effusion with life-threatening cardiac tamponade, generalized weakness due to obstructive shock, or respiratory distress.
Supplies:
- 18-gauge, 2-inch catheter (for larger dogs, you may need 14- or 16-gauge, 5.25-inch over-the-needle catheter – use your ultrasound to measure the depth of the effusion)
- Lidocaine for local block (1-2 mL deep SC)
- Extension set
- 3-way stopcock
- 20- or 30-mL syringe
- Collection bucket
- Sterile gloves
- Surgical scrub
- Electrocardiograph to monitor the ECG
- Clippers
- Sample tubes (EDTA and plain red tops)
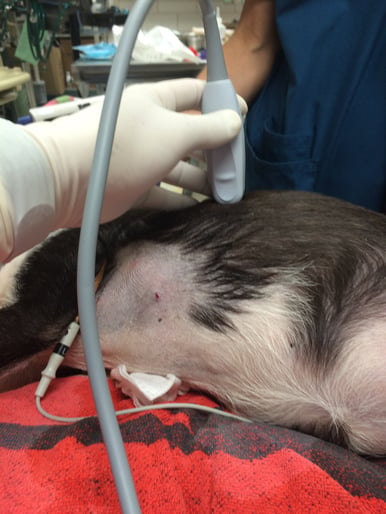
Pneumothorax (PTX) is a possible complication. Check the TFAST Chest Tube Site for lung slide prior to evaluating the Pericardial Site. Note the probe is placed at the highest point on the thorax directly above the xiphoid cheating an intercostal space cranially to be certain that you are over the pleural space and not the abdominal cavity.
Eyeball the Centimeter Scale on the ultrasound screen. Evaluate the depth to the heart – a depth you want to avoid. With your gloves on use the width of your thumb nail to measure the maximum safe depth you will insert the over the needle catheter avoiding penetration into the heart (thumbnail strategy).
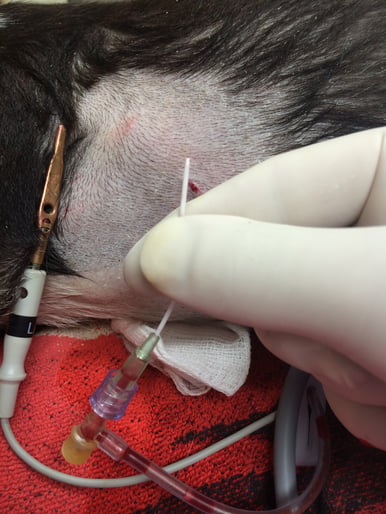
With the stylet in the over-the needle catheter, here a 2- inch 18 gauge needle, use ultrasound to determine where the heart is against the thoracic wall at the level of the costochondral junction (CCJ). I will often place a “dot” for reference with a Sharpie marker. The skin is re-prepped and lidocaine may be injected into the track at your “dot.”
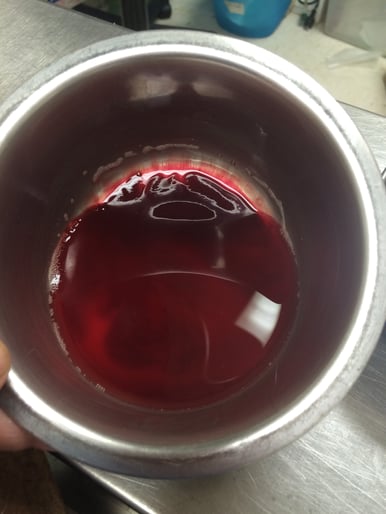
Recheck your anticipated pericardiocentesis site with ultrasound. At your “dot” make a small 1/4 inch skin incision using a #11 blade. Insert the over-the needle catheter through the skin incision to your pre-determined pre-measured depth (thumbnail strategy) looking for a flash of fluid. Most commonly expect a hemorrhagic effusion. Withdraw the stylet while further advancing the catheter. Once the stylet is withdrawn, with control, cleanly place the extension set with a 3-way stopcock and syringe for aspiration. If you do not have a stopcock, then kink the extension set when you cleanly remove the syringe to exchange or empty the syringe before re-aspirating. I set aside the first full syringe for my cytology and fluid analysis. I then use a second (or third) syringe for the remainder of the procedure.
Be calm, be clean. You won’t give your patient a pneumopericardium because no air will flow into the pericardial sac through a fluid-filled catheter.
Gently aspirate. I do NOT cut any side holes in my catheter (you may create side holes depending on the type of catheter, avoid exceeding 33% of the circumference) as it risks breaking off the catheter in the pericardial sac or pleural cavity. If I get an end point, I can recheck with ultrasound using multiple views while maintaining control of the inserted catheter. I can re-position the catheter, I can gently push a small volume of fluid back into the pericardial sac and then re-aspirate, as long as I have a clean closed system.
Most common reason for not getting fluid on aspiration. Debris plugging the catheter and kinking are common reasons why you are unable to aspirate fluid despite seeing on ultrasound that significant PCE remains. I try not to re-tap but work with the inserted catheter.
The insertion of the catheter shown at the recommended level at the level of the costochondral junction (CCJ). The “textbook side” to perform pericardiocentesis is the right side because of the cardiac notch of lung, which provides a larger window avoiding lung for catheter insertion; and avoiding the left coronary artery, which is the major blood supply to the myocardium.
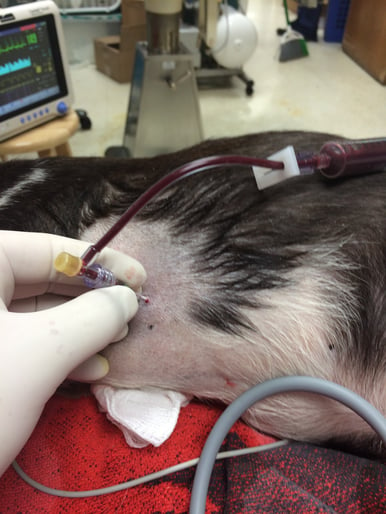
However, the right heart walls are thinner and contain dark unoxygenated blood similar to the hemorrhagic pericardial effusion that is most commonly aspirated. So if you perform centesis on right heart, it may be difficult to recognize the mistake. Thus, I prefer to tap the left side (convinced by the cardiologist I did my residency training with) because the left heart is thicker walled, the blood is oxygenated and thus bright red, and using ultrasound and pre-measuring eliminates the need for the cardiac notch.
By using ultrasound and either an ultrasound-directed (look and then remove the probe) or ultrasound-guided (watch in real-time as the catheter is inserted) approach, I can determine a safe window where the pericardial effusion is directly against the thoracic wall at the CCJ, and through pre-measuring (thumbnail strategy), know the maximum safe depth.
There should be no clots in the pericardial effusion as the blood should be defibrinated. Clotted blood may indicate that a heart chamber has been tapped. Changes in the ECG should be looked for, however, the ECG often may not obviously change with cardiac/myocardium penetration.
Recheck for pneumothorax post-procedure and use Vet BLUE to evaluate for atelectasis. If atelectatic lung is present, you may recruit lung through positive pressure assisted breaths or sighs. Also, evaluate for relief of cardiac tamponade and measure the amount of remaining effusion.